Learn about GitHub Actions and how to implement it for Android project
Use the GitHub Actions workflow to automate tasks such as building, testing,
and deploying your Android app. GitHub Actions can help you automate
nearly every aspect of your application development processes.

|
|
Photo by Richy Great on Unsplash |
GitHub Actions is a powerful and flexible automation platform that you can use
to automate tasks and workflows related to your code. With GitHub Actions, you
can automate a wide range of tasks, including building and testing your code,
deploying your code to production, and more.
Here's a more detailed understanding of what GitHub Actions is and how it
works.
What is GitHub Actions?
GitHub Actions is a powerful tool that can help you automate a wide range of
tasks related to your code. With its easy-to-use YAML syntax, flexible
triggering system, and extensive library of pre-written actions, GitHub
Actions makes it easy to automate complex workflows and streamline your
development process.
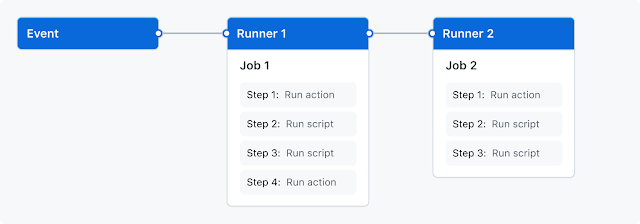
GitHub Actions is a feature of GitHub that enables you to automate tasks and
workflows. These workflows can be triggered by events such as a push to a
GitHub repository, a new pull request, or the creation of a release.

|
| Image Source: GitHub Actions |
How GitHub Actions work?
Workflow structure
GitHub Actions workflows are made up of a series of steps, which are run in
sequence. Each step is defined in a YAML file, and it can be a script, a
command, or an action. Actions are pre-written, reusable steps that can
perform specific tasks, such as checking out your code, setting up a build
environment, or deploying your code to a server.
Check the official document of
Understanding the workflow
file for a detailed understanding of Workflow.
Triggers
Workflows are triggered by specific events that occur within your
repository. For example, you could trigger a workflow when a pull request
is opened, when a new release is created, or when a branch is pushed to.
Environments
GitHub Actions provides you with a virtual environment in which your
workflows can run. This environment includes a variety of tools and
resources that you can use to build, test, and deploy your code. The
environment is isolated from the host machine, ensuring that your
workflows are reproducible and consistent.
Sharing and Reusability
You can share your workflows with others by committing them to your
repository and making them publicly available. You can also use workflows
created by others by including them in your repository as a GitHub Action.
Implement Github Actions in Android

|
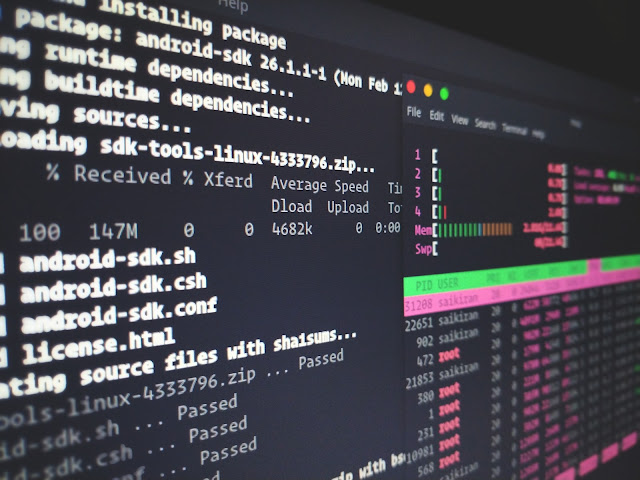
| Photo by Sai Kiran Anagani on Unsplash |
NEXT: Learn about Code Commit Guidelines using Conventional Commits, a more structured way to commit history and how to make it easier for people to contribute to your projects
You can implement GitHub Actions in Android by using the GitHub Actions
workflow to automate tasks such as building, testing, and deploying your
Android app. Here's a step-by-step guide on how to do this:
- Create a GitHub Repository: First, you need to create a GitHub repository for your Android project. If you already have a repository, you can skip this step.
-
Create a workflow file: Next, you need to create a workflow
file in your repository. This file is a YAML file that contains the
steps for your workflow. To create a workflow file, go to the
.github/workflowsdirectory in your repository, and create a new YAML file. - Define your workflow: In the YAML file, you can define your workflow by specifying the steps that you want to automate. Here's an example workflow that builds and tests an Android app:
name: Build and Test Android App

on:
  push:
    branches:
      - main

env:
  ANDROID_HOME: /usr/local/android-sdk

jobs:
  build:
    runs-on: ubuntu-latest

    steps:
    - name: Checkout code
      uses: actions/checkout@v2

    - name: Set up JDK
      uses: actions/setup-java@v1
      with:
        java-version: 11

    - name: Set up Android SDK
      uses: actions/setup-android@v1
      with:
        android-sdk-version: 30
        licenses: 'android-sdk-preview-license-52d11cd2'

    - name: Build Android App
      run: ./gradlew assembleDebug

    - name: Test Android App
      run: ./gradlew test
-
Run the workflow: Once you have defined your workflow, you can
run it by pushing it to the branch specified in the
onsection of your workflow file. In this example, the workflow will run whenever you push to themainbranch. - Monitor the workflow: You can monitor the status of your workflow by navigating to the Actions tab in your GitHub repository. From there, you can see the status of each step in your workflow, and view the logs for any steps that have failed.
By following these steps, you can use GitHub Actions to automate tasks
in your Android development workflow, such as building and testing your
app. You can also use GitHub Actions to automate other tasks, such as
deploying your app to a production server or creating a release.

Informative, nicely explained. Thank you for sharing.
ReplyDeleteThank you for explaining GitHub Actions to me.
ReplyDeleteGreat Post
ReplyDelete