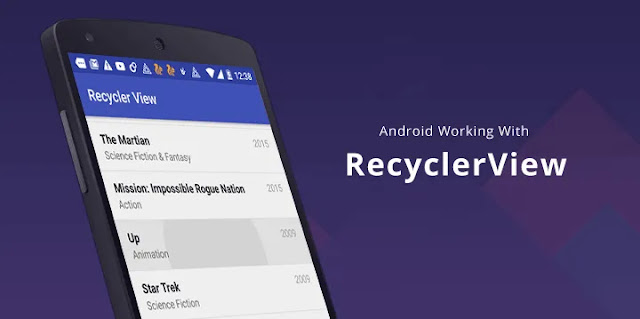
Learn how to implement RecyclerView with Item Click Listener in Kotlin.
It's really simple to create a RecyclerView in Kotlin. There are a few steps
to implement this feature, which will help you achieve your goal of
providing an easy way for users to navigate a list of items.
In this tutorial, we will learn how to implement RecyclerView with
ItemClickListener in
Kotlin.

|
| Credits: Dev Genius |
What is RecyclerView?
The
RecyclerView
is designed to display large sets of data efficiently and can handle both
horizontal and vertical scrolling. It also provides a more modular
approach to working with lists and allows for greater flexibility in the
way data is presented and interacted with.
For this tutorial, we will use AndroidX, an Android Jetpack
library. The
androidx.recyclerview the library provides
several classes and interfaces to work with the RecyclerView,
including:
RecyclerView
This is the main class for working with the
RecyclerView.
It provides a container for displaying a list of items and handles
scrolling, item layout, and recycling of views that are no longer
visible on the screen.RecyclerView.Adapter
This is an abstract class that provides the data and view holder objects
for the
RecyclerView. It requires implementing several
methods to manage the list data, including creating view holders and
binding data to them.
RecyclerView.ViewHolder
This is a class that represents a single-item view within the
RecyclerView. It holds references to the view objects and
provides a way to update the contents of the view based on the data
provided by the adapter. You can create multiple instances of RecyclerView.ViewHolder to create multiple view types.Setting up RecyclerView
First, you'll need to create a
RecyclerView in your activity or
fragment layout file.
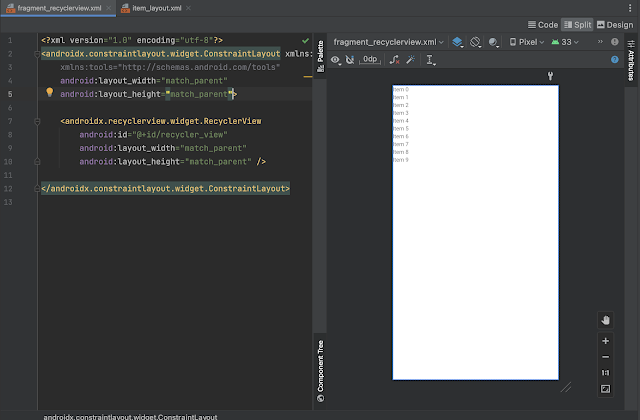
<androidx.recyclerview.widget.RecyclerView
    android:id="@+id/my_recycler_view"
    android:layout_width="match_parent"
    android:layout_height="match_parent" />
Here's an example of what that might look like:

|
| Credit: Android Academics |
Next, you need to create a layout file to display items, we named the file
item_layout file for the list to display.
item_layout.xml
<?xml version="1.0" encoding="utf-8"?>
<LinearLayout xmlns:android="http://schemas.android.com/apk/res/android"
    xmlns:tools="http://schemas.android.com/tools"
    android:layout_width="match_parent"
    android:layout_height="wrap_content"
    android:gravity="center_vertical"
    android:orientation="horizontal"
    android:padding="10dp">

    <androidx.appcompat.widget.AppCompatImageView
        android:id="@+id/imageView"
        android:layout_width="48dp"
        android:src="@tools:sample/avatars"
        android:layout_height="48dp" />

    <androidx.appcompat.widget.AppCompatTextView
        android:id="@+id/text_view"
        android:layout_width="match_parent"
        android:layout_height="wrap_content"
        android:layout_margin="10dp"
        android:textColor="@color/black"
        android:textSize="16sp"
        tools:text="@tools:sample/first_names" />
</LinearLayout>
Here's an example of what that might look like:

|
| Credit: Android Academics |
Pro Tip: If you want to see how your
RecyclerView will
look like when you run the app, you can implement the tools namespace
and use tools properties.
You can specify the list item in
tools:listitem="@layout/item_layout" and the number of items
you want to display in tools:itemCount="6"
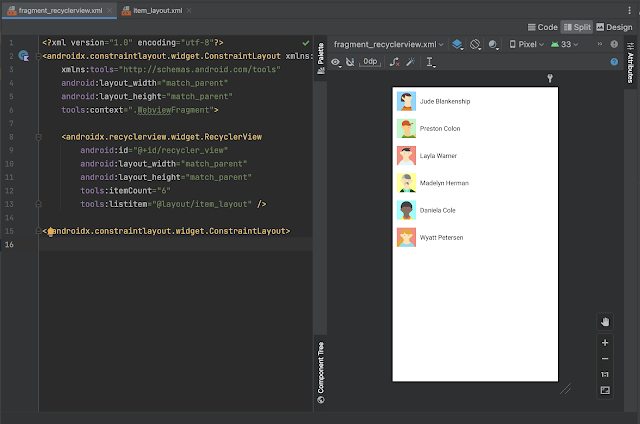
<androidx.recyclerview.widget.RecyclerView
    android:id="@+id/recycler_view"
    android:layout_width="match_parent"
    android:layout_height="match_parent"
    tools:listitem="@layout/item_layout"
    tools:itemCount="6"/>
Here's an example of what that might look like:

|
| Credit: Android Academics |
Create an adapter and view holder for RecyclerView
Next, you'll need to create an adapter for your RecyclerView. Here's an
example of what that might look like:
class MyAdapter(private val data: List<String>, private val onItemClick: (String) -> Unit) :
    RecyclerView.Adapter<MyAdapter.ViewHolder>() {

    inner class ViewHolder(itemView: View) : RecyclerView.ViewHolder(itemView) {
        fun bind(item: String) {
            itemView.setOnClickListener { onItemClick(item) }
            val textView = itemView.findViewById<TextView>(R.id.text_view)
            textView.text = item
        }
    }

    override fun onCreateViewHolder(parent: ViewGroup, viewType: Int): ViewHolder {
        val view = LayoutInflater.from(parent.context).inflate(R.layout.item_layout, parent, false)
        return ViewHolder(view)
    }

    override fun onBindViewHolder(holder: ViewHolder, position: Int) {
        val item = data[position]
        holder.bind(item)
    }

    override fun getItemCount() = data.size
}
This adapter takes a list of strings as its data and a lambda expression
onItemClick that will be called when an itemRecyclerView
is clicked. The
ViewHolder
inner class binds the click listener to the item view and sets the text of
the text_view view in the item layout.
Set the adapter and onItemClick for RecyclerView
Next, you'll need to create an instance of your adapter and set it as the
adapter for your
RecyclerView.
Here's an example of what that might look like:
fun setupRecyclerview(){
    val recyclerView = findViewById<RecyclerView>(R.id.my_recycler_view)
    val list = listOf("Item 1", "Item 2", "Item 3")

    val adapter = MyAdapter(list) { item ->
        onListItemClick(item)
    }
    recyclerView.layoutManager = LinearLayoutManager(context)
    recyclerView.adapter = adapter
}

// handle list item click here
fun onListItemClick(val item:String){
    Toast.makeText(context, "Clicked $item", Toast.LENGTH_SHORT).show()
}
This code sets the adapter for the
RecyclerView and creates a
Toast message that displays the clicked item's text when an item is clicked.
And that's it! You should now have a working
RecyclerView in
Kotlin with an item click listener.

|
| credits: Android Academics |
We hope this article has given you a better understanding of the basics of
implementing custom views with Kotlin. We've covered how to create a
RecyclerView in Kotlin, and we even explained how to set up an
ItemClickListener for it!Check these articles if you want to learn more about RecyclerView from A Step-by-Step Guide on How to Create Different View Types for RecyclerView with Kotlin on Android or how to implement endless scrolling in RecyclerView.
Thanks for reading this article. Hope you would have liked it!. Please
share and subscribe to my blog to support.

nicely explained. Thank you for sharing.
ReplyDelete